
")
")
")
")


If you're looking to create a Next.js app, the single best starting point is the official command-line tool. Just pop open your terminal and run npx create-next-app@latest.
This one command scaffolds an entire production-ready project for you. It handles all the complex setup, so you can jump straight into building features instead of wrestling with configuration files. It's the standard, battle-tested way to kickstart any modern Next.js project.
Why Build with Next.js in 2026

Before we get into the nitty-gritty of commands and code, it's worth taking a moment to understand why Next.js has become such a dominant force. In 2026, it's far more than just another framework—it's a comprehensive platform for building full-stack web applications.
The growth has been staggering. Originally released back in October 2016, Next.js now pulls in over 10 million weekly npm downloads. Even more telling is the 300% spike in enterprise adoption we've seen since 2023. This isn't just hype; it’s a clear signal that Next.js solves real-world problems. You can explore more data on this trend and its development impact over at Flex.com.ph.
Performance and Developer Experience
So, what's driving this adoption? At its heart, Next.js is obsessed with two things: top-tier performance and an incredible developer experience. It achieves this by bundling powerful solutions to common web development headaches right into the framework.
Here’s what that means for you in practice:
- Flexible Rendering: You get Server-Side Rendering (SSR) and Static Site Generation (SSG) right out of the box. This allows you to choose the perfect rendering strategy for each page, ensuring blazing-fast load times and great SEO without any complicated setup.
- Built-in Backend: With API Routes, you can create backend endpoints directly inside your Next.js project. No more juggling separate frontend and backend repositories—it all lives in one cohesive codebase.
- Automatic Optimizations: Features like automatic code-splitting, advanced image optimization, and intelligent routing are all handled for you. The result is an application that feels incredibly snappy to your users by default.
To really see the value, here’s a quick breakdown of what create-next-app gives you from the moment you run it.
Quick Start Benefits of Using Create Next App
The create-next-app CLI isn't just about creating files; it's about setting up a professional-grade foundation instantly.
| Feature | Immediate Benefit | Impact |
|---|---|---|
| Interactive Setup | Guided prompts for TypeScript, ESLint, and Tailwind CSS. | Get a project tailored to your preferences in seconds. |
Optimized tsconfig.json | Pre-configured for Next.js features and path aliases. | Avoids hours of frustrating TypeScript configuration. |
| Built-in Linting | next/core-web-vitals ESLint config is ready to go. | Enforces best practices and catches errors early. |
| Boilerplate Code | Includes a basic home page and CSS module examples. | Provides a working example to build upon immediately. |
This foundation is a huge head start, ensuring your project is built on years of accumulated web development best practices.
Think of
create-next-appas your expert co-pilot. It establishes a scalable, performant, and maintainable architecture from day one, which I’ve seen help teams ship applications faster and with far fewer bugs.
By starting your project this way, you're not just saving time. You're adopting a proven structure that scales from a small personal blog to a massive enterprise application. This strategic advantage is precisely why so many developers and companies are all-in on Next.js.
Alright, with the initial setup out of the way, it's time for the fun part: actually creating your Next.js project. Forget manually wrestling with webpack and Babel configurations. The official and universally recommended way to get started is with the create-next-app CLI.
This command-line tool does all the heavy lifting, setting up a fully-featured, production-ready application with just one command.
Pop open your terminal and run this:
npx create-next-app@latest
Running that command kicks off an interactive setup wizard. It won't just dump a generic template on you; it’ll ask a few key questions to shape the project to your exact needs. Answering these prompts correctly from the start is the first real step in building a solid app.
Walking Through the Setup Prompts
The CLI prompts are your first big decisions, and while the defaults are pretty smart, it pays to know what you're choosing. Let's go through them one by one.
- Project Name: The first thing it'll ask for is your project's name. This will also be the name of the folder it creates, so choose something clear and descriptive.
- TypeScript: You'll see "Would you like to use TypeScript?" My advice? Always say yes. The benefits of static typing—catching bugs before they hit production and creating self-documenting code—are just too good to pass up, especially as a project grows.
- ESLint: Next up: "Would you like to use ESLint?" Again, an enthusiastic Yes is the right call. A linter is your best friend for maintaining code quality and ensuring a consistent style, which is non-negotiable if you're working with a team.
- Tailwind CSS: "Would you like to use Tailwind CSS?" This is a very popular choice for a reason. Saying Yes sets up the utility-first CSS framework for you, complete with all the necessary configuration files. It's the fastest way to get styling.
src/Directory: The prompt "Would you like to usesrc/directory?" comes down to personal preference. Many developers (myself included) find that using asrcdirectory keeps your application code neatly separated from root-level config files likepackage.jsonornext.config.mjs. It just feels cleaner.- App Router: Then comes the big one: "Would you like to use App Router?" For any new project in 2024 and beyond, the answer should be Yes. This is the modern standard, unlocking powerful features like Server Components, nested layouts, and better data fetching patterns.
- Import Alias: Finally, you can customize the default import alias (
@/*). Honestly, the default is great for most projects. It saves you from writing messy relative paths like../../components/Buttonand lets you use clean imports instead.
If you want an even deeper dive into the nitty-gritty of the installation process itself, we've got you covered in our comprehensive guide on Next.js installation.
What create-next-app Gives You
Once the installer finishes its magic, you'll have a new project directory with a clean, logical structure. This isn't just a random assortment of files; every piece has a purpose, honed by years of community best practices.
Think of the
create-next-appoutput as the gold standard starting point. It's simple enough for a weekend project but robust enough to scale into a massive enterprise application.
Here’s a quick tour of the key files and folders you’ll be working with:
app/: This is where the magic happens with the App Router. All your pages, layouts, loading UIs, and components will live inside this directory.public/: Need to serve static files like images, fonts, or arobots.txt? Drop them in here. Anything inpublicis served directly by the browser without going through the build process.next.config.mjs: This is your main control panel for the Next.js framework. You'll come here to add environment variables, set up image optimization rules, or configure redirects.package.json: This standard Node.js file holds your project's metadata, lists all your dependencies (like React and Next.js), and defines your crucial scripts (dev,build,start).
With this solid foundation in place, you're officially ready to stop configuring and start building.
When you first create a Next.js app, you'll hit a fork in the road right away: App Router or Pages Router? This isn't just a small configuration choice; it’s a fundamental decision that dictates how you’ll structure your entire application, fetch data, and even think about your UI. The create-next-app wizard will ask you this question point-blank, and your answer will have a lasting impact.
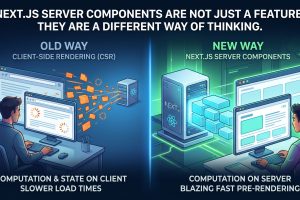
The App Router is the new default, and for good reason. It landed with Next.js 13 and is built on a powerful idea: React Server Components (RSCs). This model flips the script by letting you write components that run only on the server. They can fetch data and render to HTML without ever sending a single byte of JavaScript to the browser.
Think of it this way: a dashboard component that needs to pull user data can do all that work on the server, sending just the finished HTML to the user. This means faster initial loads and a much smaller client-side bundle. It’s a massive performance win.
This setup process, including picking your router and other essential tools, is all handled by the command-line interface.

As you can see, the modern workflow guides you toward the most powerful defaults, with the App Router at the center of it all.
Getting to Grips With the App Router
Adopting the App Router means embracing a few new concepts that really unlock its potential. It’s more than just a new way to handle URLs; it’s a whole new component-centric architecture.
Here are the big ideas you'll be working with:
- Layouts: Create shared UI that wraps around your routes. This is perfect for things like headers and sidebars that shouldn't re-render when a user navigates between pages.
- Server Components: These are your new best friend. By default, components are rendered on the server, giving them direct access to your database or backend services without needing to expose an API endpoint.
- Streaming & Suspense: This is where the magic happens for user experience. You can render pages piece by piece, showing instant loading states for slower data fetches while the rest of the page is fully interactive. Perceived performance goes through the roof.
I'll be honest, there's a bit of a learning curve here compared to the old way. But for any complex or performance-critical application, the payoff is enormous. If you're ready to dive deep, we've broken down all the patterns in our detailed guide on the Next.js App Router.
Is There Still a Place for the Pages Router?
So, with all this new hotness, is the Pages Router obsolete? Not at all.
The Pages Router is the battle-tested system that made Next.js famous. Its file-based routing is incredibly intuitive—if you’ve ever built a classic React single-page app, you'll feel right at home. You create a file in the pages directory, and it just works. Data fetching is handled with well-known functions like getStaticProps for static generation and getServerSideProps for server-side rendering.
To help you decide, here’s a quick breakdown of how the two routing models stack up against each other.
App Router vs Pages Router Feature Comparison
| Feature | App Router | Pages Router |
|---|---|---|
| Default Component Type | Server Component (RSC) | Client Component |
| Data Fetching | fetch() in Server Components | getStaticProps, getServerSideProps |
| Layouts | Built-in, nested, and stateful | Per-page or via _app.js |
| UI Streaming | Native support with Suspense | Not supported |
| Code Splitting | Automatic, component-level | Page-level |
| Learning Curve | Higher; new paradigm | Lower; familiar to React devs |
Ultimately, the choice comes down to your project's needs and your team's comfort level.
The Pages Router remains a solid and reliable choice. Its simplicity and mature ecosystem make it perfect for smaller sites, internal dashboards, or when you just need to ship something fast without a steep learning curve.
If your project is a straightforward marketing site, a personal blog, or an internal tool where raw speed isn't the absolute top priority, the Pages Router can get you to the finish line faster. Its client-focused approach is well-documented and widely understood.
But let's be clear: for any new, ambitious, or long-term project you create a Next.js app for, the App Router is the way forward. Its server-first architecture and fine-grained control over rendering provide performance benefits and architectural flexibility that the Pages Router simply can't offer. It is the future of the framework.
Alright, you've run create-next-app, and now you have a fresh, but very standard, Next.js project. This is where the real fun begins—turning that boilerplate into a development environment that works for you.
The first place I always head is the root of the project to check out the configuration files.
Files like next.config.mjs, tailwind.config.ts, and tsconfig.json are essentially the brain of your application. They control everything from how Next.js optimizes images to how TypeScript enforces its rules. Getting these right from the start will save you a ton of headaches down the road.
Tweaking the Core Configuration
Let's pop open next.config.mjs. This is your go-to for framework-level settings. One of the most common first edits is telling Next.js where it's allowed to pull images from. If you're using a headless CMS or any third-party asset service, this is a must-do.
For example, if your images are hosted on Sanity, you’ll need to add an images block to give Next.js the green light.
// next.config.mjs
const nextConfig = {
images: {
remotePatterns: [
{
protocol: 'https',
hostname: 'cdn.sanity.io', // Example for Sanity CMS
},
],
},
};
export default nextConfig;
This little snippet tells the powerful next/image component to trust and optimize images from that domain. Without it, your builds will fail. In the same vein, you'll probably want to jump into tailwind.config.ts to extend the default color palette with your brand colors or add custom fonts.
You'll also find a tsconfig.json file. The default configuration is fantastic, but as your project scales, you might want to add custom path aliases. This lets you turn messy imports like import Button from '../../../components/Button' into something much cleaner, like import Button from '@/components/Button'.
The fact that TypeScript is now the default is a huge win. Studies have shown it can reduce bugs by up to 30% in enterprise codebases, helping you build more solid apps from the get-go.
How to Manage Your Secrets (The Right Way)
Never, ever hardcode API keys or other secrets directly in your code. It's a massive security risk. Instead, Next.js has a built-in system for this using environment variables.
Just create a file in your project's root folder and name it .env.local. This file is already included in your .gitignore by default, which is perfect—it means your secrets will never accidentally be uploaded to your Git repository.
Now, here’s the crucial part: you need to know the difference between server-side and client-side variables.
- Server-Side Variables: Any variable you define (e.g.,
API_SECRET_KEY) is automatically available in server-only environments, like Server Components or API routes. It stays safely on the server. - Client-Side Variables: To make a variable accessible in the browser (for client-side code), you must prefix it with
NEXT_PUBLIC_. For example,NEXT_PUBLIC_ANALYTICS_IDcan be read by your React components.
This prefix system is a fantastic security feature. It acts as a safety net, preventing you from accidentally exposing a sensitive database key to the public.
Creating a Component and Firing Up the Server
With our initial configuration sorted, let's make something. I like to create a components folder inside the app/ directory to keep things organized. Inside, you could create your first component file, maybe Button.tsx.
Ready to see it all come to life? Open your terminal and run the dev server:
npm run dev
This command spins up a local server, usually at http://localhost:3000. One of the best parts of the modern Next.js workflow is Fast Refresh. As soon as you save a change to a component or page, you'll see it update in the browser almost instantly, all without losing your application's state. It makes development feel incredibly fluid and fast.
Getting Your New App Live on the Web

Building an app locally is one thing, but shipping it is where the real excitement begins. Thankfully, the era of wrestling with complex server setups is over. With modern platforms, you can get your Next.js app live in a matter of minutes.
For Next.js, the most natural path is deploying with Vercel. It’s built by the same minds behind the framework, so the integration is absolutely seamless. You're essentially getting a zero-configuration deployment experience designed from the ground up for Next.js.
The Vercel Advantage
Getting your app on Vercel is ridiculously easy. You just connect your Git provider—whether it's GitHub, GitLab, or Bitbucket—and pick the repository for your project. Vercel is smart enough to detect it’s a Next.js app and handles the entire build and deployment pipeline for you. No config files needed.
From that point on, every git push to your main branch automatically triggers a new production deployment. This Git-native workflow is fantastic because it gives you a clean, versioned history of every change that goes live.
In my experience, the killer feature for any team is Vercel's Preview Deployments. Every single pull request spins up its own temporary, shareable URL. This lets designers, PMs, and other devs review changes in a live environment before they hit production. It’s a game-changer for cutting down on feedback loops.
Built for Performance and Global Scale
Vercel is about more than just easy deploys; it's engineered for serious performance. When you deploy, your site is automatically distributed across a global Edge Network. This means your users get served content from a data center physically close to them, which makes for blazing-fast load times.
With Vercel's edge network covering over 100 regions to achieve sub-50ms latency and 80% of deployments now using edge computing, you're set up for global scale right from the start. It’s the kind of infrastructure that powers giants like Netflix. To really get a sense of how Next.js is changing the game at this level, you can discover more about the full-stack revolution at Flex.com.ph.
You also get a ton of other critical features right out of the box:
- Automatic HTTPS: SSL certificates are handled for you, keeping your site secure with zero effort.
- Custom Domains: Pointing your own domain at a Vercel project is a simple, guided process that takes minutes.
- Analytics: Get a clear picture of your traffic and site performance with Vercel's built-in, privacy-first analytics.
While Vercel is the go-to for many Next.js developers, it's not the only great option out there. Platforms like Netlify and AWS Amplify also provide excellent, first-class support for Next.js. They offer similar CI/CD pipelines and are definitely worth a look, especially if your team is already invested in their ecosystems. If this is all new to you, our guide on cloud-based application development is a great place to get your bearings.
Got Questions? You're Not Alone.
Even after a smooth setup with create-next-app, you're bound to run into a few head-scratchers. That’s totally normal. As you get your bearings, a few questions tend to pop up for just about everyone. Let's walk through some of the most common ones I hear from developers.
Is Next.js Always the Right Choice?
First up, the big one: Should you always reach for Next.js? While it's my go-to for most projects, the honest answer is no, not always. Context is king.
If you're building a simple, mostly static site—like a blog or a portfolio with little user interaction—a framework like Astro or Eleventy might be a simpler, faster fit. On the flip side, for a highly dynamic, animation-heavy app where SEO isn't the primary concern (think an internal dashboard or a complex graphic editor), you might find that classic React with a build tool like Vite gets you there more directly.
That said, the industry has placed its bets for most full-stack web applications. An incredible 68% of JavaScript developers are now actively using Next.js. Digging into the job market, an analysis of over 1,000 React positions revealed that a staggering 71% specifically require Next.js skills. This isn't just a trend; it translates directly into career growth, often with salary bumps of 20-30% for developers who have mastered the framework. You can see the full breakdown of these Next.js trends over on Flex.com.ph.
How Do I Handle Global State in the App Router?
This is probably the most common stumbling block for developers moving to the App Router. The server-first architecture is powerful, but it means you can't just slap useState or useContext into your server components. So, where does your global state live now?
The key is to think in two distinct buckets:
- Server Data: Any data you fetch on the server (like user profiles or product lists) should be passed down from Server Components to Client Components as props. No state needed.
- Client UI State: For purely interactive state—think a theme switcher, a modal's open/closed status, or a shopping cart—you'll use React's
ContextAPI, but with a twist.
You’ll create a dedicated provider component (like ThemeProvider.tsx) and mark it with the "use client" directive at the top. This tells Next.js that the component and its children are interactive. Then, you simply wrap your root layout.tsx file with this provider. This approach gives you the best of both worlds: fast, static rendering from the server, with pockets of interactivity powered by shared client-side state.
For more complex applications, lightweight libraries like Zustand or Jotai are fantastic choices that integrate perfectly with this pattern.
What's the Best Way to Add Global CSS?
While Tailwind CSS and CSS Modules are brilliant for component-level styling, you'll always have a few styles that need to apply everywhere—like font definitions, CSS resets, or a color palette.
The canonical place for these styles is the
app/globals.cssfile generated bycreate-next-app. Any styles you put in this file are automatically applied across your entire application.
All you have to do is make sure it's imported into your root layout file, app/layout.tsx:
import './globals.css';
My advice? Keep this file lean. Use it for CSS variables, a simple reset, and maybe your body and html typography. For everything else, stick to Tailwind or CSS Modules. This keeps your styling predictable and avoids the specificity wars that can make large CSS codebases a nightmare to maintain.
At Next.js & React.js Revolution, we publish daily guides and tutorials to help you master the modern web. Explore our deep dives into React, Next.js, and the entire JavaScript ecosystem by visiting us at https://nextjsreactjs.com.


")
")
")
")
")

Add Comment